One of the most important things to think about when starting to build your own timber deck—actually, before beginning the construction—is to make sure you have the proper tools. As the old saying goes: “The right tool for the right job.” Many DIYers already know the importance of having the right tools on hand for any job they are about to undertake. Others believe they have the right tools, yet find themselves making unexpected trips to the hardware store. Some believe that the tools they have will work, even if they aren't designed for the exact task they have in mind. While it might work, they often do not realise what the end cost will be.
If you are looking to construct your own timber deck, you may want to have a look over this list. These are some of the most common tools you will find in any timber decking construction project. There are some other, more unique tools for specific jobs, but this list covers just about everything from start to finish.
Tools for your timber decking project might be considered materials, but the big difference is that tools are supposed to last. They should last through the entire job. There are some that will wear away and break such as saw blades and drill bits—but, when used properly—the drill and saw should make through this job and many more.
1. Measuring Device
One of the first things you will find yourself in need of is a measuring device. A standard 25-metre measuring tape is going to be your best friend. This will be used to make most of your measurements. For ease of use, you may also consider a smaller, 8-metre tape measure. This will take care of the smaller tasks. For larger measures, you may want to consider surveyor’s tape. This is the flexible plastic kind that winds up. We'd recommend buying a nice quality tape measure. You do not want the bargain brand that is likely to break on you sometime during the timber deck construction. Higher quality brands will bring a bit of peace of mind, as you can be more sure that they were made with stricter standards, and thus will provide you with more accurate measurements.
2. Line Marker and Line Level
When measuring, you will also find it necessary to have a line marker and line level. You should buy a good quality line marker and level—the kind that uses the refillable chalk dye. This way you can use it over and over again, and it will be good for more than just this job. There are some quality line marker and level sets, where the level is part of the entire device. This is a good investment. This way you will not end up displacing one of the two—they will always be together. If you have not used one of these before, be sure to ask your supplier for some instruction. It can be easy to misuse such a tool. The importance of the line marker and level is for making sure items from one side of the deck to the other are level with one another. This is highly important and it is easy to make a mistake if you have not done it before. Be sure to familiarise yourself with the workings of the line marker and level before commencing with the construction of your timber decking.
3. Shovel
When building a timber deck, you are going to have a need for some shovels. There are two kinds of shovels you will want. The first is a flat-headed, square, or pan head shovel. The flat design and broad mouth of this type of shovel is ideal for clearing out the area for the base of your timber decking. This can also help in trying to shape holes for posts and for mixing and transporting wet concrete. You will also want a rounded or spade style shovel that is made for piercing the earth. This is going to help you get started with the perimeter for your timber deck as well as assist with digging holes for posts and mixing and transporting concrete.
4. Post hole digger
A post hole digger will be of great advantage to you when digging the holes for your timber decking posts. This works well with sandy, loamy, and clay-filled areas. There may be times when a post hole digger is less than ideal based on the type of soil you are working with, and you may have to fall back to using a shovel. If possible, however, use the post hole digger as it will save you a lot of time. In fact, when digging for your posts and piers, you may find it useful to mark the post hole digger with some colourful tape, so you know when your hole has reached the right depth.
5. Sawhorse
If you do not have a sawhorse yet, go get one. In fact, get two. These are great inventions, which are going to help you a lot. Get an adjustable set, and make sure they are made of sturdy aluminium or steel. Of course, the steel ones are a bit more expensive. A sawhorse is going to come in handy when cutting wood for your timber decking, making measurements, and they often help support joining pieces when putting together framework. For framing, some will use as many as three or four sawhorses at a time.
6. Extension Cord
Here is one we often overlook until the last minute—an extension cord. Do not try using one of the cheap, indoor extension cords either. Instead, invest in a good 16 gauge or better extension cord designed for outdoor use. They have thicker shielding and carry the current better. Some even have built-in surge protectors. That is a nice little investment when you are working with expensive tools like saws and drills. Also, make sure the extension cords you use are long enough for your timber decking project. It is worth the investment to have one long extension cord rather than two that are daisy-chained together. It is safer and better with only one cord between the power supply and tool.
7. Saw
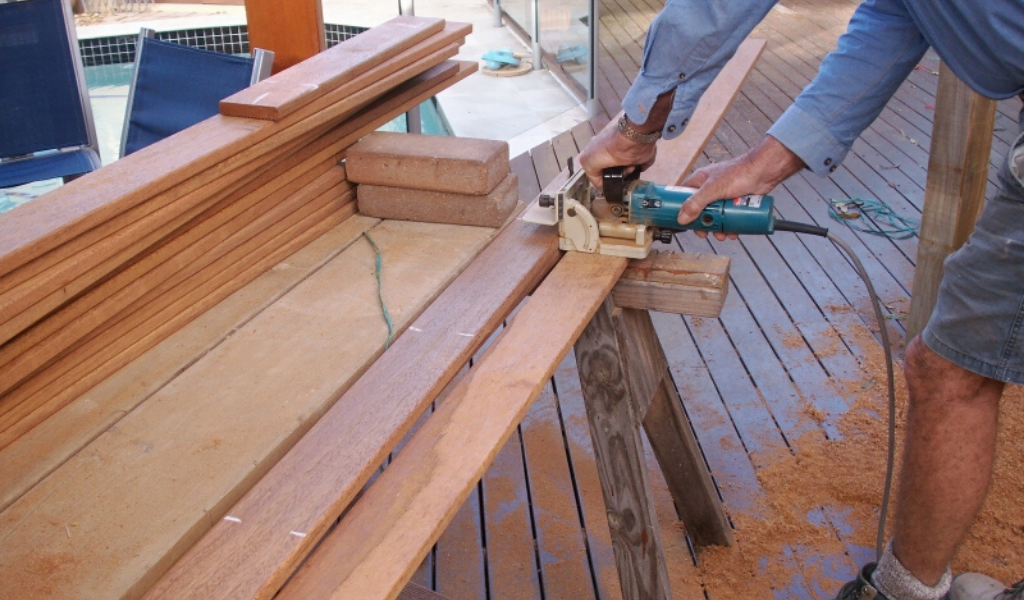
Saws. It is going to be impossible to build a timber deck without a saw. You may have more than one saw. Some will use a table saw if they have one. Meanwhile, a decent circular saw is invaluable when you are working on a timber decking project. A standard 185-millimetre circular saw should handle most jobs you run into while dealing with your timber decking. This can be used to cut railings, planks, joists, and more. You are almost assuredly going to go through at least a few blades, so be sure to stock up on extras.
8. Square or T-square
A square or T-square will be essential in your timber decking adventures. This is what you are going to use to verify that the frame and any steps you build for your deck are, in fact, square. It is also a good idea to use a flashlight in conjunction with a square to help verify your findings. In fact, many hardware shops sell coloured lenses for small flashlights that are used for just this sort of purpose.
9. Hammer
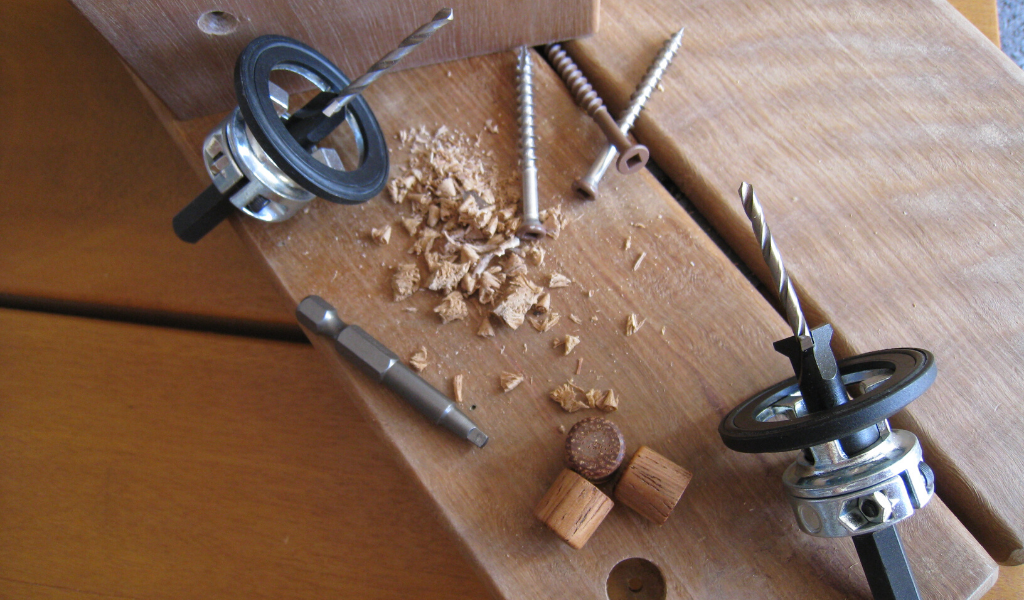
 There are a few types of hammers you will need when working on your timber decking. In building your own deck, you will want a framing hammer, a finishing hammer, and a rubberwood mallet. The framing hammer will most likely see the most use. You will want a heavier style, so nails can be driven in deep and fast to fasten frames, joists and similar, hidden bits of the construction. The framing hammer is the one with a textured head, which is designed that way to grip the nail heads better. The finishing hammer has a smooth face, so it does not mar the surface of the wood when driving in nails in the proper fashion. The finishing hammer is what you will want to use whenever needing to nail something in place on a side of the timber decking that will be visible. The rubberwood mallet will be used to help align joists, planks, and more. You will also use this when you are working with any sort of wooden plug to hide the appearance of screws in a visible surface.
10. Level
Also, be sure to use a level when working on your deck. You can use a traditional, liquid-filled level, or you can use a digital version. Nowadays, you can even choose one that uses a laser to level things further apart, but those are pretty costly. Stick with a traditional bubble or newer digital level to help make sure everything on your timber decking is perfectly level. Remember, you are going to measure the levelness from side to side, front to back, and diagonally (both ways).
11. Utility Knife
A utility knife will come in handy when building a timber deck. You will need to open a variety of packages, cut strings, mark wood, and more. A knife will come in more handy than you might expect when first going over the plans. Be sure to pick up one that will last.
12. Tin Snips
If you are going to use aluminium flashing for your ledger boards—most do—you are going to need some tin snips. This is definitely one of those things you want to be sure you have the right tool for. Using the wrong tool here is going to ruin that tool, take too long, and could even lead to injury. Trust us on the tin snips.
13. Pry Bar
A flat pry bar is also going to be useful to you. When you are building your own timber deck, a pry bar can be used to help align the decking. You may also make a mistake here and there, and a pry bar is going to help you unmake those mistakes quickly.
14. Ratchet Spanner
A ratchet spanner or spanning ratchet is going to help out with a few things on your timber deck. This tool will work for fastening bolts and nuts. You may want two—one for each side, but that is a personal choice. Typically, you will use this for attaching ledger boards, railing, and sometimes even posts.
15. Caulking Gun
One thing we often see people forget until they get very near the end of building their own timber deck is a caulking gun. You will definitely want to be sure you have one or two of these on hand. A caulking gun will be useful when trying to apply glue or silicone in various situations during the construction process.
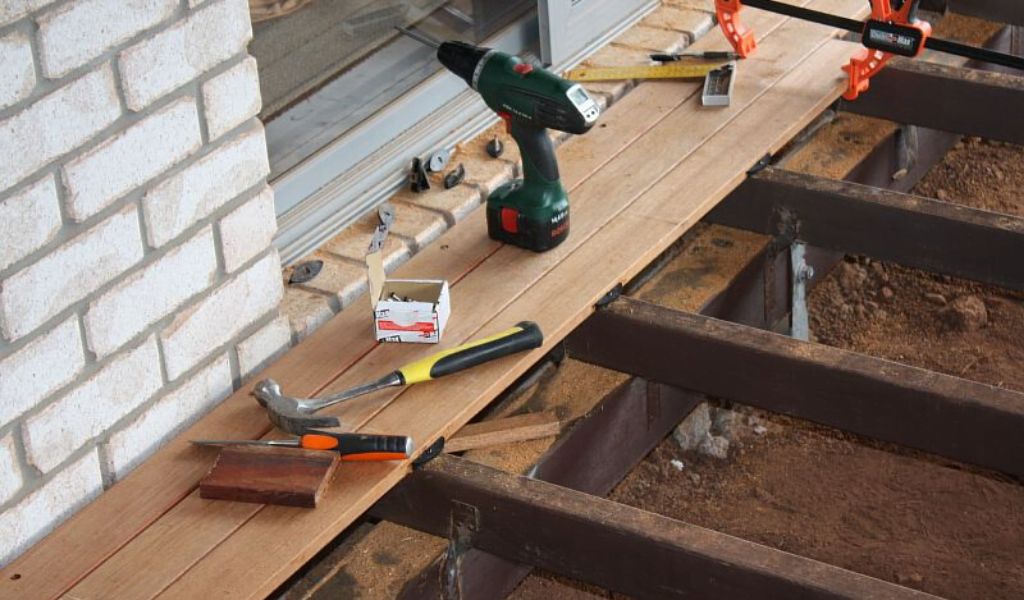
16. Drill
Of course, you will also need a drill. We recommend using a corded power drill for most everything, especially the heavier jobs. On light, quick drilling needs during timber deck construction, a good battery-powered drill will also work. The drills should use the same head. Also, whenever using a battery drill, we always recommend having two batteries—one in the drill and one charging. This way, you will not get in the middle of something and then need to wait for a charge. You are going to burn out a few drill bits most likely, so be sure to have some spares of those as well.
17. Clamp
Another awesome and helpful tool in the timber decking building process is a clamp. Get the right size, quick release clamps and you will find framing and even laying timber decking planks to be so much easier. One man can do the work of two or three with these clamps.
18. Paintbrushes
You will also end up needing some paintbrushes when it comes time to finish your timber decking. You will need some buckets to go along with that to put the brushes in. Again, have some spares.
19. Wheelbarrow
Another thing you may find helpful in building a timber deck is a wheelbarrow. This will come in handy for hauling things around the yard and is often the method of choice for mixing concrete if you do not invest in a concrete mixer. If nothing else, some heavy-duty utility buckets should do the trick.
20. Portable work table
In almost all cases, a portable work table is a great investment. You can put your plans and tools here while not in use, but soon to be used. This can also keep other things you may want to keep off the ground such as a drink or phone.
As always, be sure you have the right tools for the right job. If you want to see a great way on how to have the best looking deck around and save time and money in doing so, be sure to check out the No Nail timber decking solution by Deck-Max.